• Guys, we've spent considerable money converting the Les Paul Forum to this new XenForo platform, and we have ongoing monthly operating expenses. THE "DONATIONS" TAB IS NOW WORKING, AND WE WOULD APPRECIATE ANY DONATIONS YOU CAN MAKE TO KEEP THE LES PAUL FORUM GOING! Thank you!

Need Help Mounting Pickgaurd

BIG Dave

Active member
Joined
Aug 18, 2001
Messages
2,421
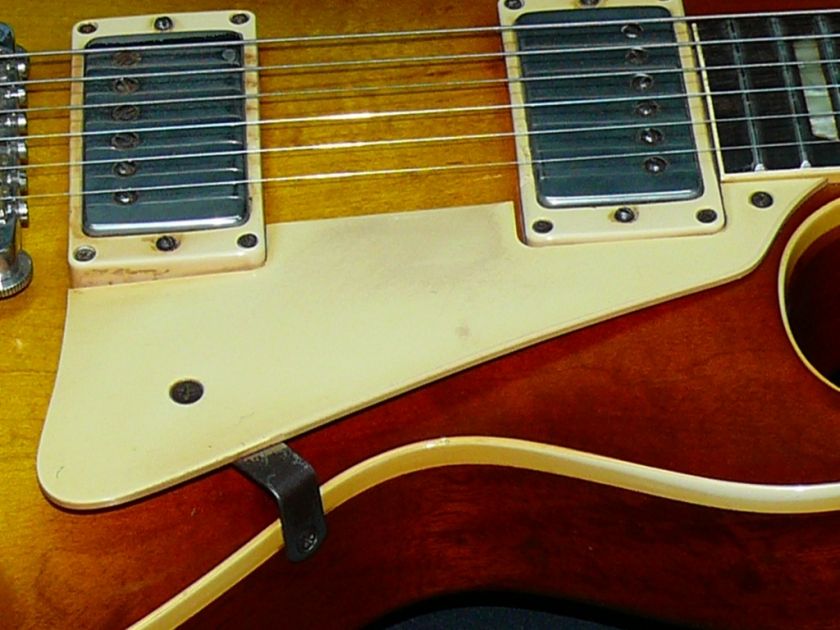
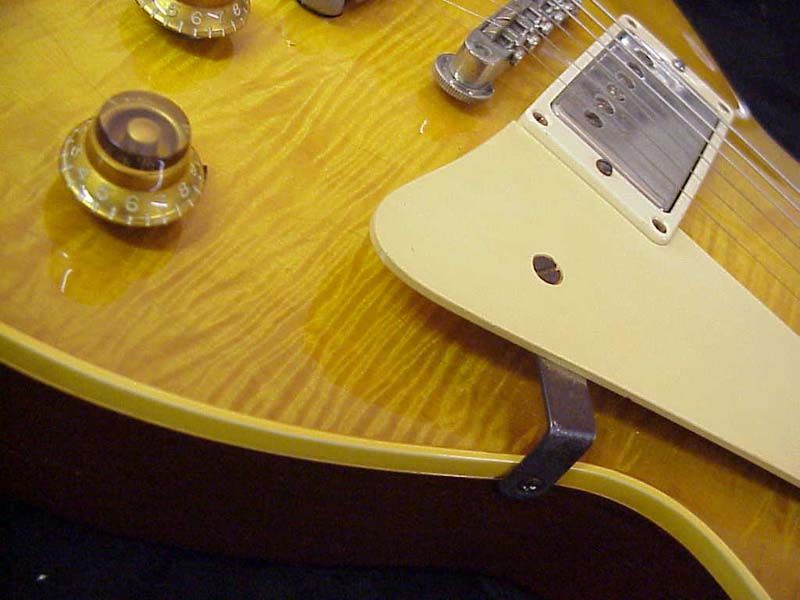
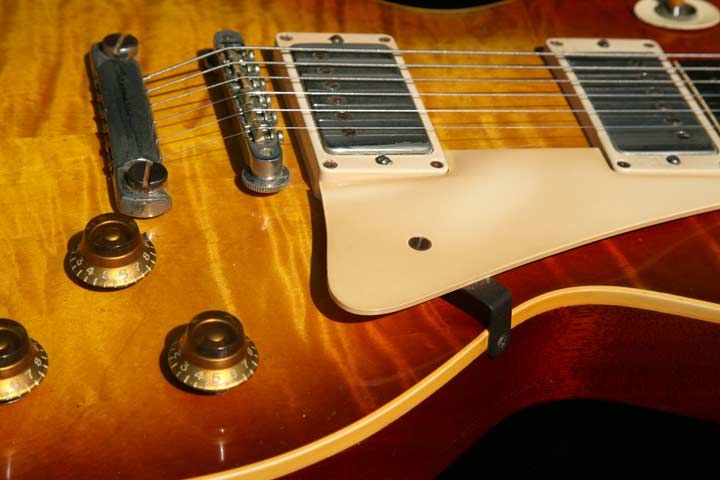
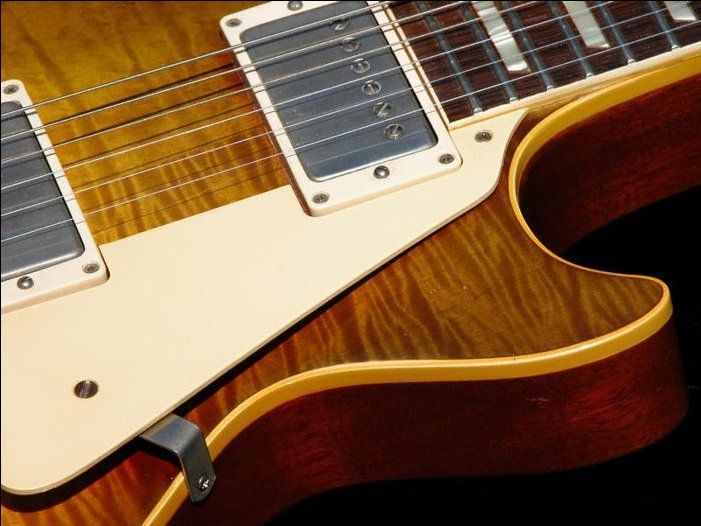
Last year I purchasd a 2014 R8 that came without the pickgaurd attached, no holes drilled. Drilling the hole near the neck seems like a no brainier, place the new pickgaurd on the guitar and use the hole in the pickgaurd as a guide. It's the hole that goes through the binding on the side/bottom of the guitar that I'm concerned about. Should I remove the pickgaurd with the bracket firmly attached from another Les Paul, place it on the 2014 R8 and use that as a guide? Suggestions welcome. Once it's drilled, it's done and I don't want to do it wrong.

Lemon1small.jpg


Lemon2small.jpg
 

bluesky636

Well-known member
Joined
Jan 10, 2014
Messages
676
1. Attach the bracket loosely to the pickguard.
2. Attach the pickguard loosely to the previously drilled hole by the neck.
3. Position and hold the pickguard bracket on the body side where it gives you the fit on the body and around the pickup surrounds that you want.
4. Lightly mark the bracket drill hole using a pencil poked through the bracket body hole.
5. Remove pickguard.
6. Drill hole in body side with a drill bit slightly smaller in diameter than the screw. Drill hole slightly deeper than screw is long.
7. Clean up sawdust and attach pickguard.
8. Play guitar.
 

BIG Dave

Active member
Joined
Aug 18, 2001
Messages
2,421
So in summary, I just eyeball where the bracket lies against the body? I doubt that's what Gibson does....
 

Joe Boy

New member
Joined
Dec 1, 2004
Messages
515
Put the drill down and please back away from that be u ti full guitar.
 

Texas Blues

Active member
Joined
Apr 13, 2008
Messages
4,641
Don't do anything except take it to someone qualified to do the work.

Drilling into an R8 is not for those with limited experience.

For one, you need to tape the marks to be drilled so there's no chipping.

And the drill bit needs to be taped or marked to avoid over drilling.

There's no second chance on stuff like this.
 

bluesky636

Well-known member
Joined
Jan 10, 2014
Messages
676
So in summary, I just eyeball where the bracket lies against the body? I doubt that's what Gibson does....

You're right. Gibson is probably no where near that exact.

You asked for suggestions, I gave you step by step instructions. Yeah. Put some tape on the body if you want and around the drill to mark the depth. it ain't rocket science.
 

bluesky636

Well-known member
Joined
Jan 10, 2014
Messages
676
Don't do anything except take it to someone qualified to do the work.

Drilling into an R8 is not for those with limited experience.

For one, you need to tape the marks to be drilled so there's no chipping.

And the drill bit needs to be taped or marked to avoid over drilling.

There's no second chance on stuff like this.

It's not brain surgery either. :rolleyes:
 

bluesky636

Well-known member
Joined
Jan 10, 2014
Messages
676
Affirmative.

Right up until "hey kid's watch this...."

You already know how the video turns out.

We're talking about drilling one tiny hole that will be invisible when finished into a $5000 reissue, not a $250,000 (or whatever they are worth today) original. If you or the OP are afraid or incapable of doing that, then by all mean pay someone to do it. Hell, I'll do it for you for free. I'll do some test drilling first. :rofl

Shiitake-Log-Drilling.jpg
 

bluesky636

Well-known member
Joined
Jan 10, 2014
Messages
676
<iframe src="//www.youtube.com/embed/QBTmQu4xPqw" allowfullscreen="" frameborder="0" height="315" width="420"></iframe>

Scary stuff.
 

BIG Dave

Active member
Joined
Aug 18, 2001
Messages
2,421
Allow me to clarify what I'm asking. I am asking how to correctly set the angle of the bracket in relationship to the pickgaurd. The rest of it I understand. I suggested using a pickgaurd with bracket attached off another Les Paul and use that as a drilling guide. Looks like that is the way to go. Thanks to everyone that offered assistance.
 

DANELECTRO

Well-known member
Joined
Feb 24, 2003
Messages
6,320
Allow me to clarify what I'm asking. I am asking how to correctly set the angle of the bracket in relationship to the pickgaurd.

Don't use the pickguard from another guitar as a reference for the angle because it may be different. There is only one angle that the bracket will mount perfectly flush against the side of your guitar. If it is swung too far CW or CCW, then one side of the bracket will not be in contact with the guitar.

To determine the angle of the bracket, tighten the bracket screw so that its snug, but loose enough that you can still move the bracket around a bit. Hold the pickguard up against the rings and swing/slide the bracket around until it is flush against the side of the guitar. There is your angle. Tighten the screw so that the bracket doesn't move, double-check it with the guitar to make sure it is still flush. If so, you can now use the bracket/pickguard assembly as a template to mark the location of the hole.

As far as the height of the side hole goes, Gibson was not real consistent and I've seen it float around from being completely into the binding to being completely below the binding, but for the most part it seems like the target height for the screw hole is right at the edge of the binding.


bluesky636

Well-known member
Joined
Jan 10, 2014
Messages
676
Don't use the pickguard from another guitar as a reference for the angle because it may be different. There is only one angle that the bracket will mount perfectly flush against the side of your guitar. If it is swung too far CW or CCW, then one side of the bracket will not be in contact with the guitar.

To determine the angle of the bracket, tighten the bracket screw so that its snug, but loose enough that you can still move the bracket around a bit. Hold the pickguard up against the rings and swing/slide the bracket around until it is flush against the side of the guitar. There is your angle. Tighten the screw so that the bracket doesn't move, double-check it with the guitar to make sure it is still flush. If so, you can now use the bracket/pickguard assembly as a template to mark the location of the hole.

As far as the height of the side hole goes, Gibson was not real consistent and I've seen it float around from being completely into the binding to being completely below the binding, but for the most part it seems like the target height for the screw hole is right at the edge of the binding.

From my original post:

1. Attach the bracket loosely to the pickguard.

3. Position and hold the pickguard bracket on the body side where it gives you the fit on the body and around the pickup surrounds that you want.

4. Lightly mark the bracket drill hole using a pencil poked through the bracket body hole.


Same as what Danelectro said but in fewer words.
 

Uncle Gary

Active member
Joined
Oct 15, 2006
Messages
2,431
One more thing. Don't even think of using a power drill to drill these holes. What you want is a "pin vise". This is a small, hand held chuck that you can use to hold the drill and turn slowly with your fingers. If this isn't familiar to you, then take the guitar to someone who knows what they're doing.
 

Django2014

New member
Joined
Sep 24, 2014
Messages
330
Leave the Pickgaurd off, bursts looks better without them, goldtops look better with Pickgaurds

That guitar looks sexy without it
 
Last edited:

bluesky636

Well-known member
Joined
Jan 10, 2014
Messages
676
One more thing. Don't even think of using a power drill to drill these holes. What you want is a "pin vise". This is a small, hand held chuck that you can use to hold the drill and turn slowly with your fingers. If this isn't familiar to you, then take the guitar to someone who knows what they're doing.

Adjustable speed power drill set on a low speed works just fine.
 

Django2014

New member
Joined
Sep 24, 2014
Messages
330
wouldn't you want to first make a small indent in the finish so that the bit doesnt walk, just as you would do if you were drilling metal, and then set it to a medium/high speed to get a nice clean hole?
 

Texas Blues

Active member
Joined
Apr 13, 2008
Messages
4,641
wouldn't you want to first make a small indent in the finish so that the bit doesnt walk, just as you would do if you were drilling metal, and then set it to a medium/high speed to get a nice clean hole?

Drilling 101.

But hey.....

Ever body can do this!

Its so simpo!
 
Top